 how-to
Best Way to Clean Solar Panels Safely: 2026 Guide
Table of Contents
- Why Cleaning Solar Panels Matters for Energy Output
- Solar Panel Cleaning Tools: What You Need
- Step-by-Step: How to Clean Solar Panels Safely
- Risks of DIY Solar Panel Cleaning
- Solar Panel Warranty Requirements: What You Need to Know
- Seasonal Cleaning Schedules and Troubleshooting
- When to Hire a Professional Solar Panel Cleaning Service
- Frequently Asked Questions
Last Updated: September 16, 2026
Why Cleaning Solar Panels Matters for Energy Output
Dirty solar panels quietly drain your energy production, and most homeowners don't notice until their utility bill climbs. According to the U.S. Department of Energy solar energy resource, soiling from dust, pollen, and bird droppings reduces photovoltaic output over time, with heavy accumulation causing meaningful efficiency loss across a photovoltaic array. This guide from Elite Solar Cleaning Pros breaks down the best way to clean solar panels safely, from the tools you need to the mistakes that void your manufacturer warranty.
Solar Panel Cleaning Tools: What You Need
The right tools cost far less than a damaged panel. A non-abrasive brush, a garden hose, and deionized water cover most residential jobs; abrasives and harsh chemicals cause the damage you're trying to prevent.
Essential Tools for Safe Cleaning
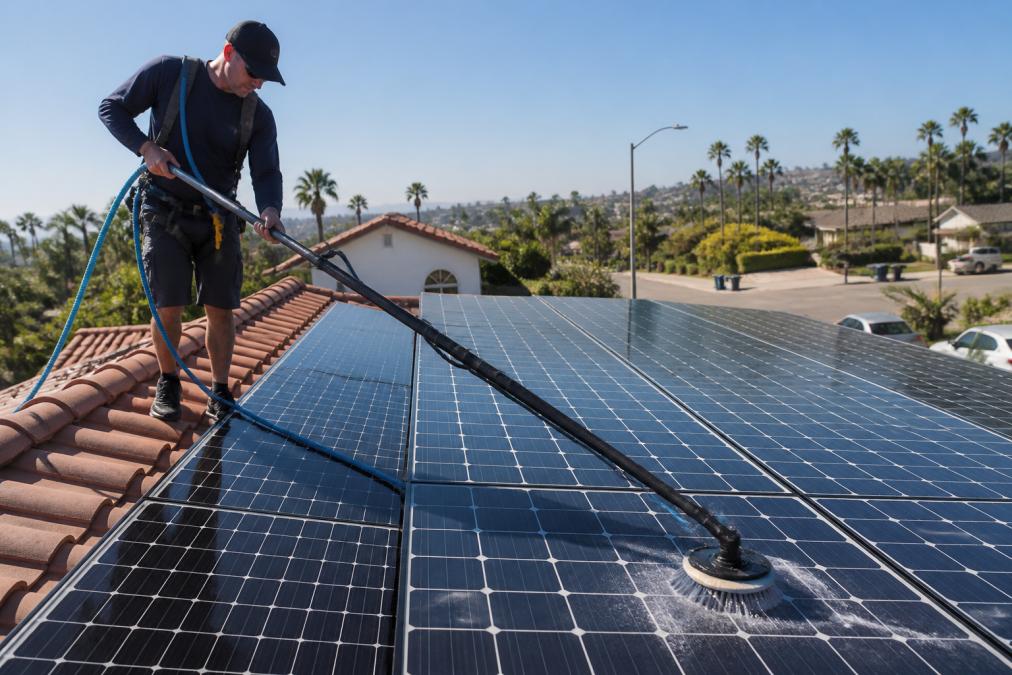
- Soft-bristle or non-abrasive brush with an extendable pole to reach roof-mounted arrays without walking on them
- Garden hose with a gentle spray nozzle for pre-rinsing loose debris
- Deionized (DI) water or a squeegee for a spot-free finish
- Mild dish soap diluted in water for stubborn grime, used sparingly
- Safety harness rated for roof work, plus non-slip shoes
- Microfiber cloths for edges and frames
A water-fed pole with DI water lets you clean from the ground, which is the single biggest safety upgrade most homeowners can make.
What to Avoid Using
Skip abrasive materials, scouring pads, and any cleaner containing ammonia or harsh solvents, these scratch the glass, and those micro-cracks become permanent traps for dirt and moisture. Never use a pressure washer at close range; the force can breach the panel seal and damage electrical components. Vinegar can etch the anti-reflective coating if left to sit, so use it cautiously or not at all.
Step-by-Step: How to Clean Solar Panels Safely
The safest method combines ground-level reach with careful timing, and takes most homeowners 30 to 60 minutes.
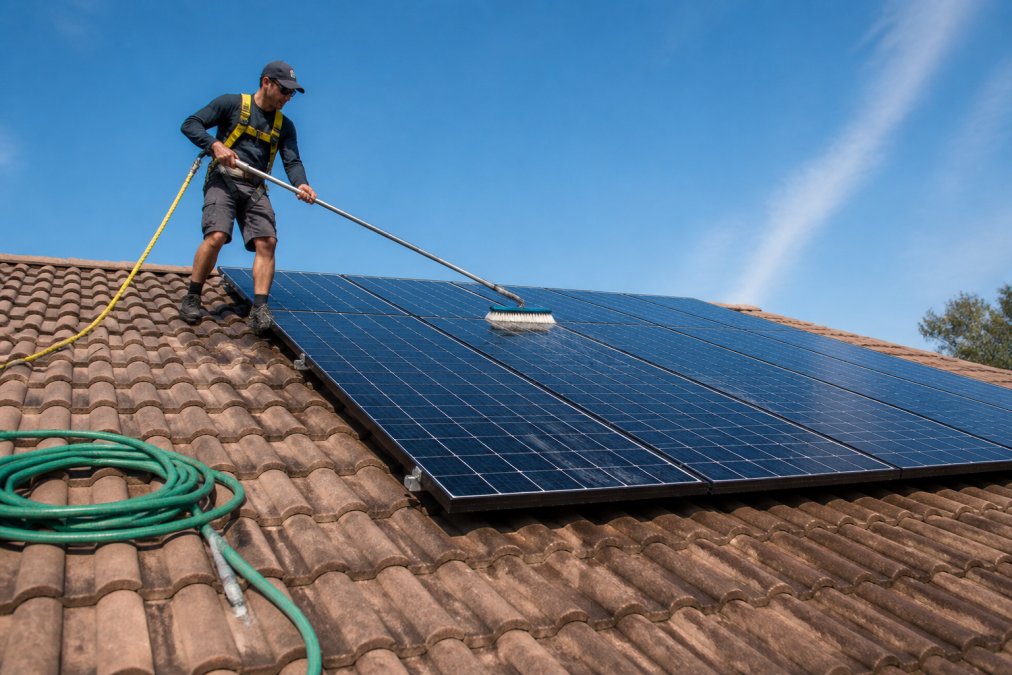
- Shut down if your manual requires it. Some systems have a rapid shutdown switch; check your inverter documentation.
- Work in early morning or late afternoon when panels are cool to the touch.
- Rinse loose debris with a garden hose, top to bottom, before any scrubbing. This prevents grinding grit into the glass.
- Apply mild soapy water with a soft-bristle brush for stubborn spots, using gentle scrubbing only where needed.
- Rinse thoroughly with deionized water to avoid mineral deposits.
- Squeegee or wipe dry to prevent spotting, especially in hard-water areas.
- Inspect for damage while you're up there: cracked glass, loose wiring, or debris under the frame.
Risks of DIY Solar Panel Cleaning
The biggest danger isn't the panel; it's the roof. Falls remain the leading cause of serious injury in residential roof work, and a wet, sloped surface makes every step riskier. A fall and a scratched array are both preventable with specific habits.
Roof Safety and Fall Prevention
If your panels are roof-mounted, the safest method keeps you on the ground. A water-fed pole with a soft brush reaches most single-story and many two-story arrays from a stable standing position, the biggest safety upgrade available to a homeowner.
- Ladder placement. Set the ladder on firm, level ground, never on mulch, gravel, or a slope. Use the 4-to-1 rule: for every 4 feet of working height, the base sits 1 foot out from the wall. Extend it at least 3 feet above the roof edge, and secure the top or use stabilizers so it can't slide.
- Roof pitch. Low-slope roofs (roughly 4:12 and under) are walkable for many people in dry conditions, but as pitch climbs, traction drops fast. Steep pitches demand roof anchors, a harness, and training. If you're not sure of your pitch, stay off the roof.
- Harness and anchoring. A fall-arrest harness only works if it's anchored to a rated point, a permanent roof anchor, ridge anchor, or manufacturer-approved attachment. Anchoring to a vent pipe, chimney, or gutter is a common and dangerous mistake; those points can't hold a falling body.
- Never work alone. Have a spotter on the ground who can call for help and who keeps the ladder base clear.
- Weather and surface. Skip the roof entirely when it's wet, icy, windy, or when morning dew hasn't burned off. Wet panels and wet shingles are both slick.
If your array sits on a steep pitch, a multi-story roof, or a roof with fragile tiles, the math favors hiring a licensed, insured crew. The cost of a professional cleaning is a fraction of the cost of a fall or a cracked tile.
Water Hardness and Spotting
Hard water is the quiet second risk most DIY guides underplay. Tap water carries dissolved calcium and magnesium; when you rinse a hot panel with it, the water evaporates and leaves those minerals behind as a chalky film. That film scatters and blocks light the same way dust does, and because it bonds to the glass, it can be harder to remove than the original soiling.
The fix is straightforward:
- Use deionized (DI) water for the final rinse. DI water has had its dissolved minerals removed, so it dries without leaving anything behind. A water-fed pole with a DI cartridge lets you rinse and finish in one pass.
- Or squeegee dry immediately. If you're working with tap water, don't let it air-dry. Pull the water off with a clean squeegee before it evaporates.
- Test your tap water first. Fill a clean drinking glass, let it dry on the counter, and look at it. If it leaves a hazy ring or spots, it will do the same to your panels.
A quick hardness check: if your tap water leaves spots on a clean drinking glass, it will leave them on your panels. That's your signal to switch to DI water or commit to a squeegee finish on every wash.
The Damage You Can't Undo
Two mistakes cause permanent harm, and both are easy to avoid:
- Abrasive scrubbing. Scouring pads, stiff brushes, and dry wiping grind grit across the glass. Those micro-scratches trap dirt and moisture, accelerating soiling and clouding the surface.
- Pressure washing at close range. High-pressure spray can force water past the panel seal into the junction box or wiring, causing corrosion or electrical faults, and can crack the glass. If you use a pressure washer at all, keep it on a wide fan and well back, or skip it entirely.
Solar Panel Warranty Requirements: What You Need to Know
Your manufacturer warranty likely has conditions about cleaning, and violating them can void coverage. Most require non-abrasive methods and forbid anything that scratches the glass or stresses the frame.
Common requirements include:
| Warranty Condition | What It Means for You |
|---|---|
| Non-abrasive cleaning only | No scouring pads, brushes, or pressure washers |
| No harsh chemicals | Avoid ammonia, solvents, and undiluted vinegar |
| No panel modification | Don't remove or adjust mounting hardware |
| Documented maintenance | Keep records of who cleaned and when |
Seasonal Cleaning Schedules and Troubleshooting
Most guides give you a calendar, but that's the wrong tool. Cleaning frequency should follow your environment, not the month, because what lands on your panels, pollen, desert dust, snow, or construction grit, determines how fast soiling builds and how much output you lose. Below is a schedule built around the conditions that drive soiling, plus troubleshooting for the mistakes hardest to undo.
Match Your Schedule to Your Climate
Start with a baseline of two to four cleanings a year for a typical residential array, then adjust for what your location throws at it:
- Heavy pollen regions. Spring pollen can coat an array in days. Clean right after peak pollen weeks pass, and expect to repeat near dense trees, pollen is sticky and holds moisture, making it a stubborn film rather than loose dust.
- Desert and dusty climates. Fine dust accumulates continuously and is often worst after wind events. A quarterly schedule is common, with an extra pass after any major dust storm. Pre-rinse dry dust before brushing so you don't grind grit into the glass.
- Snow and winter climates. Don't scrape ice or packed snow off the glass, you risk scratching it, and panels produce little under snow cover anyway. Let snow melt off naturally, then rinse residual dust and road grime after the storm clears. Never use hot water on cold glass; thermal shock can crack a panel.
- Coastal areas. Salt spray leaves a film that attracts and holds dust. Rinse after storm season, and prioritize a DI-water finish because salt residue is corrosive to frames and mounting hardware.
- Nearby construction or agriculture. Both generate heavy particulate. If there's active work next door, check your panels monthly and clean as needed rather than waiting for a scheduled date.
Troubleshooting Common Cleaning Mistakes
Even careful homeowners hit problems. Here's what each symptom usually means and how to respond:
- Streaks or spots after drying. Almost always a rinse problem: you either used tap water with dissolved minerals or let it air-dry. Re-rinse with DI water and squeegee dry. If spots persist after a second DI rinse, they may be etched mineral deposits rather than fresh residue.
- A stubborn haze that won't lift. Often baked-on mineral scale or pollen bonded to the glass. Gentle repeated washing with DI water is safe; avoid abrasives or strong acids, which turn a cosmetic problem into permanent damage.
- Scratched glass. Stop cleaning with that tool immediately. Light surface scratches are often cosmetic with limited output effect; deeper scratches that trap dirt are a different matter. There's no safe DIY fix, have a professional assess whether the panel still performs within spec.
- Used the wrong soap. If you used a cleaner with ammonia, a solvent, or an undiluted acid, rinse thoroughly with plain DI water as soon as possible. Don't scrub to compensate, and check your warranty language, since some cleaners affect coverage.
- Production dropped after cleaning. Usually not dirt-related. Check for a loose connection, a tripped breaker, or a rapid-shutdown switch that wasn't reset. If output stays low, contact your installer, a sudden drop after work on the array is worth a professional look.
Keep a simple log of every cleaning: date, method, water type, and any issues you noticed. If you ever file a warranty claim or sell the home, that record shows the array was maintained to the manufacturer's standard.
When to Stop and Call a Pro
Some problems are beyond a homeowner's toolkit: etched mineral scale, scratched glass, persistent production drops, or any array on a steep or fragile roof. A licensed, insured professional can assess the panel, document its condition for warranty purposes, and clean without adding risk.
When to Hire a Professional Solar Panel Cleaning Service
Some jobs are worth handing off. If your array sits on a steep pitch, you're seeing hard-water spotting, or your system is commercial-grade, a professional service protects your safety and your warranty.
Frequently Asked Questions
Is Dawn dish soap safe to clean solar panels?
No, Dawn and other dish soaps can leave a film that attracts dust and may void your panel warranty. They often contain fragrances, dyes, or degreasers that can damage the anti-reflective coating. The best way to clean solar panels safely is with plain water and a soft brush. For stubborn bird droppings, use a mild soap specifically labeled safe for solar panels, then rinse thoroughly with deionized water to prevent mineral spots.
What should you not clean solar panels with?
Avoid abrasive materials like steel wool or scouring pads, which can scratch the glass and cause micro-cracks. Never use pressure washers, as the high-pressure water can force moisture into electrical components and damage seals. Skip harsh chemicals, vinegar solutions, or any cleaner containing ammonia or chlorine. These can degrade the panel's surface and may violate your manufacturer warranty. Stick to soft-bristle brushes, a garden hose, and deionized water for safe cleaning.
Can I use a pressure washer on my solar panels?
No, pressure washers are not safe for solar panels. The force of the water can crack the glass, dislodge seals, and push water into electrical connections, leading to corrosion or electrical hazards. Even at low settings, the pressure can damage the panel's protective coating. For safe cleaning, use a garden hose with a gentle spray nozzle and a soft-bristle brush. If you have heavy soiling, a professional solar panel cleaning service uses deionized water and water-fed poles to clean without high pressure.
How often should solar panels be cleaned for optimal performance?
Most homeowners should clean their solar panels every six to twelve months. However, in areas with heavy pollen, dust, or bird droppings, you may need cleaning every three to four months. Seasonal schedules help: clean in spring after pollen season and in fall after leaves drop. If you notice a drop in energy production, check for soiling. Professional services can assess your specific needs and set a maintenance schedule that protects your investment and keeps energy output high.
Dirty panels erode your savings one sunny day at a time, and the wrong cleaning method can cost you far more than the dirt ever did. Elite Solar Cleaning Pros offers eco-friendly DI water cleaning, a licensed and insured team, and a method built to protect your investment while restoring up to 30% of your energy output. Get started with Elite Solar Cleaning Pros and get a free quote to keep your system performing at its best.